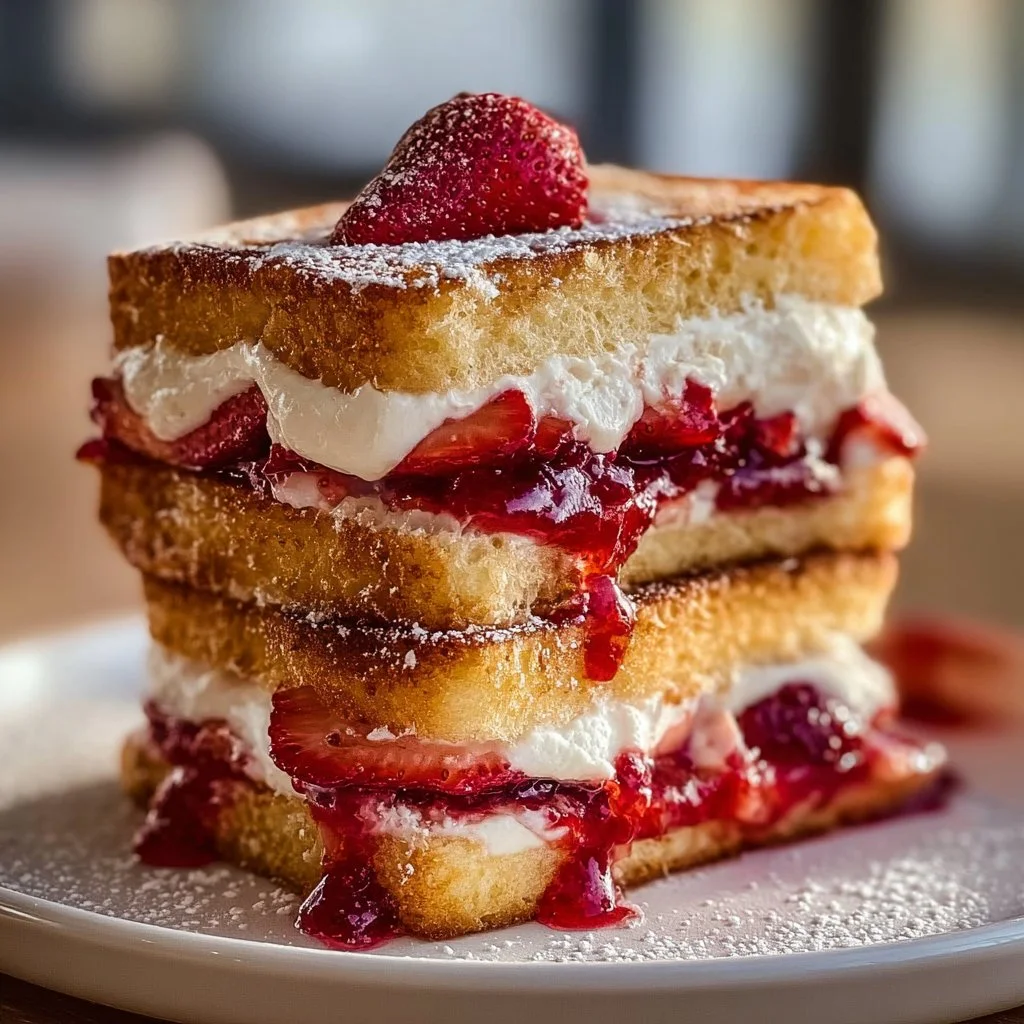
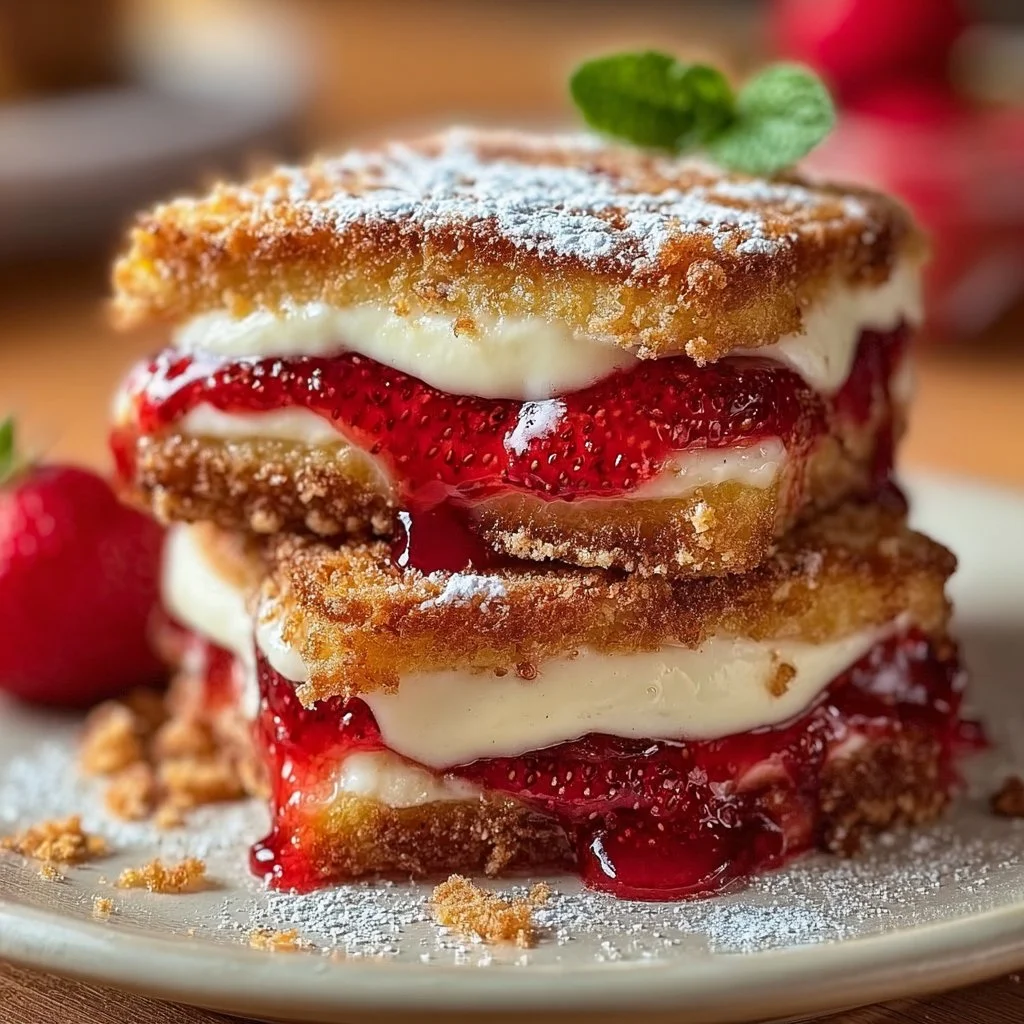
Fried Strawberry Cheesecake Sandwiches
A Dessert That Will Make You Swoon
Imagine biting into a warm, crispy exterior only to unveil a delectable, creamy center filled with sweet strawberries and a velvety cheesecake mixture. Sounds heavenly, right? That’s exactly what you get with these Fried Strawberry Cheesecake Sandwiches! This recipe is a delightful twist on a classic that’s perfect for satisfying those sweet cravings quickly and easily. Say goodbye to boring desserts—this one’s a showstopper!
Why Make This Recipe
Why would you want to whip up these Fried Strawberry Cheesecake Sandwiches? Well, here are a few sweet reasons:
- Family-Friendly Fun: Kids and adults alike will jump at the chance to indulge in these sandwiches. Plus, they’re simple enough for the little ones to help out!
- Quick Cleanup: Who likes spending hours in the kitchen? Not you! With just one pan for frying and a few mixing bowls, this dessert makes cleanup a breeze.
- Totally Irresistible: Seriously, these sandwiches have that perfect balance of creamy and crunchy. You might just find your friends begging for seconds.
Ingredients
You don’t need fancy stuff — just these basics!
- 4 ounces cream cheese, softened
- 1/4 cup powdered sugar
- 1 teaspoon vanilla extract
- 10-12 slices of bread
- 1 cup fresh strawberries, sliced
- 1 cup flour
- 1 cup milk
- 1 cup breadcrumbs
- Vegetable oil, for frying
Directions
Here’s how to make your mini masterpieces in just a few steps:
- In a bowl, mix together the softened cream cheese, powdered sugar, and vanilla extract until smooth.
- Spread the cream cheese mixture over half of the bread slices, then top with sliced strawberries. Cover with the remaining bread slices to form sandwiches.
- In three separate bowls, set up a breading station with flour, milk, and breadcrumbs. Dip each sandwich first in flour, then in milk, and finally in breadcrumbs, ensuring they are fully coated.
- Heat vegetable oil in a deep skillet over medium heat.
- Fry the sandwiches in batches until golden brown on both sides, about 2-3 minutes per side.
- Remove from the oil and drain on paper towels.
- Serve warm and enjoy!
How to Make Fried Strawberry Cheesecake Sandwiches (Overview)
Making Fried Strawberry Cheesecake Sandwiches is as easy as 1-2-3! First, whip up that creamy filling and layer on the strawberry goodness. Next, bread them up like a champ—don’t rush this part! And finally, let those beauties fry until they’re perfect and golden. Trust me, getting that crispy crunch is where the magic happens. Pro tip: Make sure the oil is hot enough to fry quickly; you don’t want soggy sandwiches!
How to Serve Fried Strawberry Cheesecake Sandwiches
Take your serving game up a notch with these ideas! Dust the sandwiches with a light sprinkle of powdered sugar for that extra touch, and maybe even drizzle some chocolate sauce over the top. Serve them on a vibrant plate alongside a cup of fresh whipped cream. The blend of colors and textures will make your dessert table pop, while the dreamy aroma will have everyone drooling!
How to Store Fried Strawberry Cheesecake Sandwiches
Want to save some for later? These little treasures will keep well in the fridge for about 2-3 days. Just make sure to store them in an airtight container. For a crispy refresh, you can pop them in the oven for a few minutes. A microwave can work too, but you’ll lose that fabulous crunch!
Tips to Make Fried Strawberry Cheesecake Sandwiches
Ready to be a sandwich pro? Here are some insider tricks:
- Use day-old bread: It holds up better during frying and adds to the crunch.
- Don’t skip the chilling: Place the breaded sandwiches in the fridge for about 10 minutes before frying to help them hold their shape.
- Mix it up: Try adding different fruits like bananas or blueberries for a twist.
Variation
Want to customize these delights? You can easily make them vegan by swapping out the cream cheese for a plant-based alternative and using non-dairy milk. Add a bit of cinnamon to the breading for a warm twist!
FAQs
1. Can I make these sandwiches ahead of time?
Absolutely! You can prepare and bread them, then refrigerate until you’re ready to fry.
2. Can I freeze these sandwiches?
Yes, just freeze them before frying. When you’re ready to indulge, fry them directly from the freezer, adding a minute or two to the cooking time.
3. What if I don’t have breadcrumbs?
Crushed graham crackers or even cereal can work in a pinch! It’ll give you that crunchy goodness with a new flavor.
📌 Pin this recipe for your next cozy dinner night!

Fried Strawberry Cheesecake Sandwiches
Ingredients
Method
- In a bowl, mix together the softened cream cheese, powdered sugar, and vanilla extract until smooth.
- Spread the cream cheese mixture over half of the bread slices, then top with sliced strawberries. Cover with the remaining bread slices to form sandwiches.
- In three separate bowls, set up a breading station with flour, milk, and breadcrumbs. Dip each sandwich first in flour, then in milk, and finally in breadcrumbs, ensuring they are fully coated.
- Heat vegetable oil in a deep skillet over medium heat.
- Fry the sandwiches in batches until golden brown on both sides, about 2-3 minutes per side.
- Remove from the oil and drain on paper towels.
- Serve warm and enjoy!