Red Velvet Cheesecake Brownies
The Ultimate Indulgence Meets a Classic
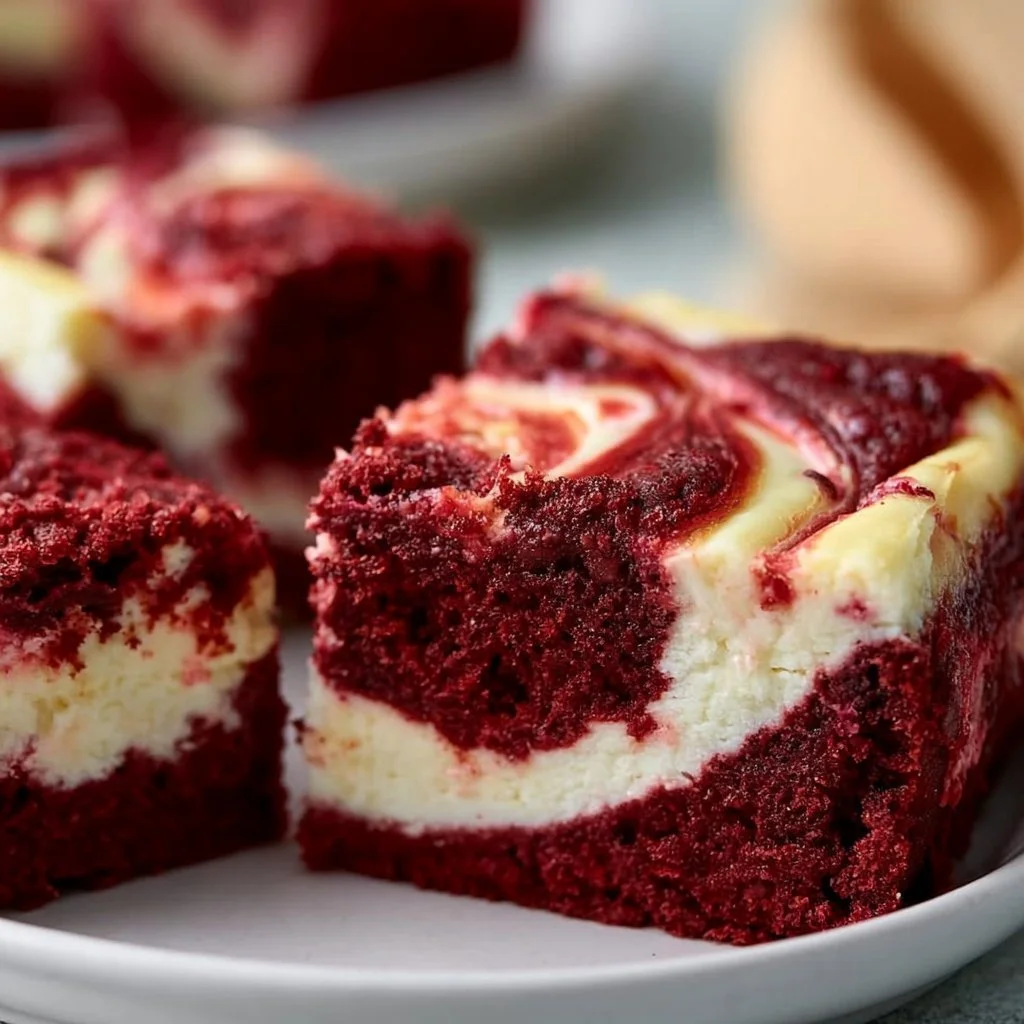
Have you ever dreamt of a dessert that combines rich cream cheese with a soft, chocolatey brownie base, all topped off with that striking red color? If so, get ready for a flavor explosion! These Red Velvet Cheesecake Brownies will have your taste buds dancing and your friends begging for seconds. They’re the perfect mix of tangy and sweet, with a luxurious texture that’s simply unforgettable.
Why Make This Recipe
There are so many reasons to whip up these decadent brownies! For starters, cleanup is a breeze since it all happens in one pan—who doesn’t love less dishwashing? Plus, they’re totally family-friendly; kids and adults alike adore this treat, making it a guaranteed hit for gatherings or cozy nights in. And let’s be honest: chocolate and cream cheese in the same bite? Yes, please! 😍
Ingredients
You don’t need fancy stuff — just these basics!
- 1/2 cup unsalted butter, melted
- 1 cup granulated sugar
- 2 large eggs, at room temperature
- 1 1/2 teaspoons red food coloring
- 2 teaspoons vanilla extract
- 1/2 teaspoon salt
- 3/4 cup all-purpose flour
- 3 Tablespoons Dutch process cocoa powder
- 8 ounces cream cheese, at room temperature
- 1 large egg, at room temperature
- 1/3 cup granulated sugar
Directions
- Preheat your oven to 350°F (175°C) and grease a 9×9 inch baking pan.
- In a medium bowl, mix the melted butter and granulated sugar until smooth.
- Add the eggs, red food coloring, vanilla extract, and salt, and mix well.
- Slowly add the flour and cocoa powder, stirring until just combined.
- In another bowl, beat the cream cheese with one egg and 1/3 cup of sugar until smooth.
- Pour half of the brownie batter into the prepared pan, then swirl in the cream cheese mixture, followed by the remaining brownie batter.
- Use a knife to create a marbled effect.
- Bake for about 30-35 minutes, or until a toothpick inserted comes out mostly clean.
- Allow to cool before cutting into squares.
{image_2}
How to Make Red Velvet Cheesecake Brownies (Overview)
Making these brownies is super simple! You just need to mix, layer, and bake. Start by creating your brownie base full of that rich cocoa flavor. As you add the cream cheese layer, you can’t help but get excited about that gorgeous swirl you’re creating. Pro tip: Don’t overmix the brownie batter; you want that marbled look to shine through!
How to Serve Red Velvet Cheesecake Brownies
When it comes to serving, don’t hold back! These brownies are perfect on their own, but if you want to elevate them, consider a dusting of powdered sugar or a drizzle of chocolate sauce. Picture this: a warm brownie, slightly gooey in the center, paired with a scoop of creamy vanilla ice cream—now that’s a dessert to impress! 🍦

How to Store Red Velvet Cheesecake Brownies
These brownies keep well in the fridge for about 5 days, so you can satisfy your sweet tooth throughout the week. For longer storage, freeze them! Just wrap each square tightly in plastic wrap, then pop them in an airtight container. Want to enjoy later? Just let them thaw at room temperature or warm them briefly in the microwave.
Tips to Make Red Velvet Cheesecake Brownies
- Test your baking time: ovens can vary, so check for doneness a few minutes before the timer goes off.
- For an extra decadent twist, swap in white chocolate chips for added gooeyness.
- Use room temperature ingredients for smoother mixing; it makes all the difference!
- Don’t skip the cream cheese layer—it’s what sets these brownies apart from your average chocolate treat!
Variation
Want to jazz things up? Try adding a hint of espresso powder to the brownie batter for a mocha flair, or replace the cream cheese with a vegan alternative if you’re going dairy-free. There’s so much potential to explore!
FAQs
1. Can I make these brownies ahead of time?
Definitely! They store well in the fridge for up to a week, or you can freeze them for later.
2. What can I use instead of red food coloring?
If you prefer a natural alternative, beet juice is a great option, though it may alter the flavor slightly.
3. How do I get clean cuts in my brownies?
Use a sharp knife that you dip in hot water, then wipe it clean between cuts for neat squares.
📌 Pin this recipe for your next cozy dinner night!

Red Velvet Cheesecake Brownies
Ingredients
Method
- Preheat your oven to 350°F (175°C) and grease a 9x9 inch baking pan.
- In a medium bowl, mix the melted butter and granulated sugar until smooth.
- Add the eggs, red food coloring, vanilla extract, and salt, and mix well.
- Slowly add the flour and cocoa powder, stirring until just combined.
- In another bowl, beat the cream cheese with one egg and 1/3 cup of sugar until smooth.
- Pour half of the brownie batter into the prepared pan, then swirl in the cream cheese mixture, followed by the remaining brownie batter.
- Use a knife to create a marbled effect.
- Bake for about 30-35 minutes, or until a toothpick inserted comes out mostly clean.
- Allow to cool before cutting into squares.